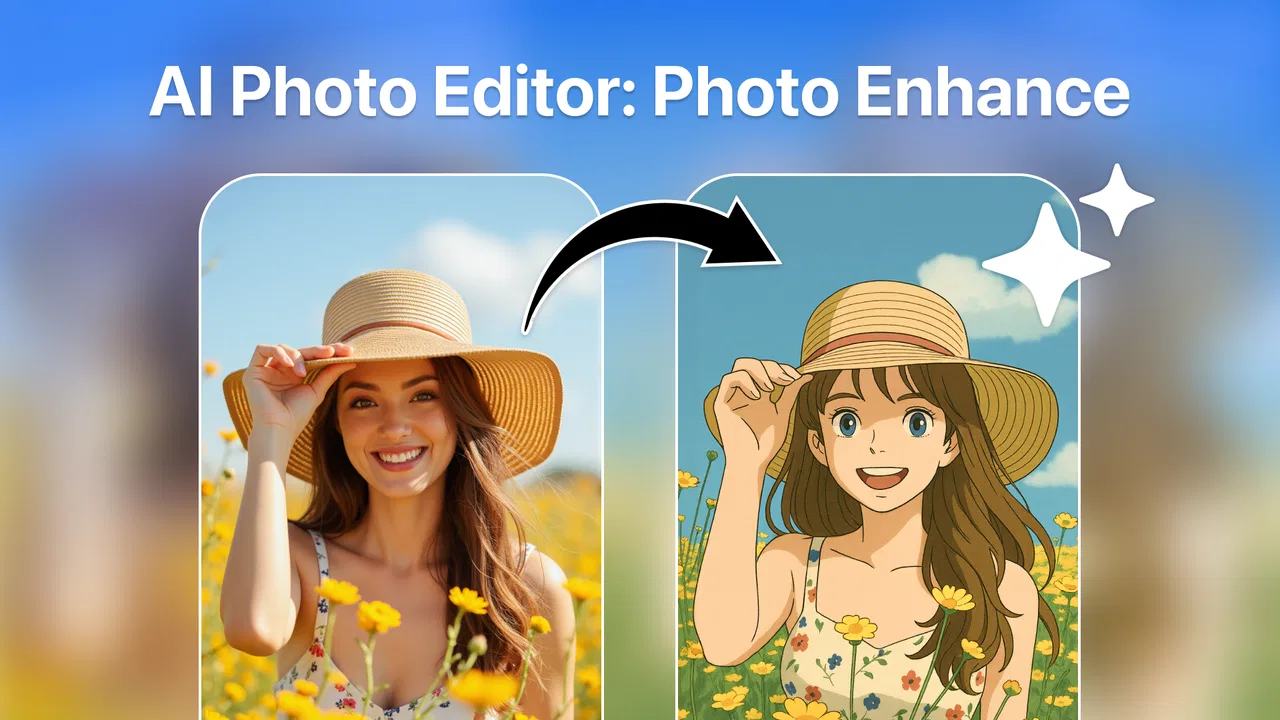
AI Photo Editor: Photo Enhance
- 4.0
- Rating
- 1.00M
- Installs
- Free
- Price

 Analysis by App-foxy
I usually judge a beauty app by one simple question: can it improve an ordinary photo without turning the person in it into a plastic-looking version of themselves? AI Photo Editor: Photo Enhance is aimed at that everyday problem. It is a free photo-editing app from AMOBEAR TECHNOLOGY GROUP, focused on sharpening soft images, retouching portraits, and removing unwanted objects. Its promise is straightforward, but the useful part is learning where its automatic treatment helps and where a more traditional editor would give you better control.
The app is listed in the Beauty category and carries an Everyone age rating, so it is approachable for casual users rather than designed only for professional photographers. It has passed the one-million-install mark and holds a 4.1 average from roughly five thousand ratings. Those figures suggest a broad audience, although I would still treat it as a quick enhancement tool rather than a complete replacement for a serious desktop editor.
What to expect before you start editing
The main experience is built around giving an imperfect picture a cleaner, more presentable finish. That makes sense for old family images, slightly blurry snapshots, portraits with small distractions, or social photos that need a quick polish before sharing. I would not approach it expecting a full layer-based studio with detailed color management, manual masking, or advanced retouching controls. Its appeal is speed and accessibility.
You May Also Like

 Blood Strike: 2.5 Anniversary
Blood Strike’s Loadouts Turn Every Drop Into a Tactical Gamble
A close look at Blood Strike’s custom loadouts: how fast access to signature weapons reshapes its battle royale rhythm, rewards preparation, and narrows the gap between fights.

 Pandora - Music & Podcasts
Pandora’s Music Is Easy to Start, but Harder to Recover
Pandora’s strength is its low-effort path from a seed to a station. Its weak spot is how much confidence it asks you to place in connection, setup, and quiet recovery.
 8 Ball Pool
 Is Built on Rivalries, Rematches, and Routine
A close look at the rivalries, rematches, shared routines, and unanswered safety questions that turn a quick pool match into a persistent mobile community.

 Samsung Music
’s Quiet Strength Is Playing What You Already Own
Its reach comes less from spectacle than from dependable access to a personal library. That simplicity is both the app’s strongest retention engine and its ceiling.

 AccuWeather: Weather Radar
AccuWeather Review: A Quick, Clear Forecast for Everyday Decisions
For everyday plans, the best forecast is the one you can understand quickly. AccuWeather makes rain timing, radar, and local conditions easy to act on, with a few trade-offs.

 Hill Climb Racing
Why Hill Climb Racing Still Turns Crashes Into One More Run
A tiny car, a bumpy hill and one more upgrade: Hill Climb Racing keeps resurfacing because its simple chaos makes every near-miss feel personal.
More From Our News Desk
View All News

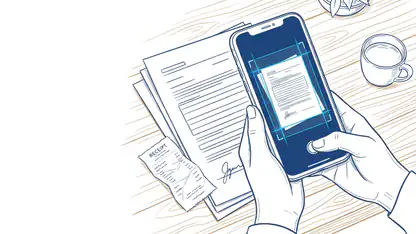
The store summary highlights three connected jobs: improving image clarity, retouching a photo, and removing an unwanted object. In practice, those jobs should be treated as separate decisions. A blurry picture may benefit from enhancement, while a distracting sign or passerby needs removal. Applying every available correction simply because it is there can make a face look unnatural or create visible patches in the background.
That distinction is one of the most important things for a first-time user to understand. The best result usually comes from making one modest correction at a time, checking the image after each step, and keeping the original untouched. If the app lets you compare the edited result with the starting image, use that comparison frequently rather than trusting the enlarged preview alone.
AI Photo Editor: Photo Enhance is free to install, with in-app purchases ranging from $1.99 to $49.99 per item. I would therefore begin with a real but non-essential picture, not the only copy of an irreplaceable photograph. This gives you a safe way to learn which editing actions are available before deciding whether the free experience is enough for your needs.
Who will get the most from it
I see the strongest fit for someone who receives a slightly soft portrait from a messaging app, finds an old image that needs a cleaner presentation, or wants to remove a small background distraction without learning complicated software. It is also useful when the goal is practical rather than artistic: making a profile picture clearer, preparing a family photo for a digital album, or tidying a casual travel shot.
It is less suitable for photographers who need exact control over sharpening, exposure, skin texture, color channels, or the boundaries of an object removal mask. A conventional editor is usually better when you need to preserve a particular visual style or make a series of consistent adjustments across many images. Automatic enhancement is convenient, but convenience often means accepting the app’s interpretation of what the photo should look like.
Getting through the first setup without confusion
After installing it, I would begin by choosing a picture that has a clear problem. A mildly blurry face, a small object near the edge, or a portrait with a minor blemish is easier to evaluate than a dark, heavily compressed image with several issues at once. The first image should help you see the effect of the editor, not force you to guess whether the source itself was too poor.
Keep the original in your gallery and work from a copy whenever possible. This is a particularly useful habit with automatic tools because an enhancement can look impressive at first glance but less convincing after you inspect hair, eyes, text, or repeating patterns in the background. A saved original also lets you return later with a different approach instead of trying to undo several edits in an uncertain order.
The app runs on Android devices using version 8.0 or later. That makes it accessible to many older phones, but the actual editing experience can still depend on the device, image size, and complexity of the requested correction. I would avoid switching between several demanding apps while processing a large picture, especially on an older handset. Even when an editor is simple to operate, image work can be more comfortable when the phone has room to complete each action.
One practical setup choice is to decide what the final image is for before touching the controls. A picture intended for a small profile image does not need the same treatment as one you plan to print or display on a large screen. Over-sharpening can be hidden at a small size but become distracting when viewed closely. Conversely, a very gentle edit may look unchanged in a thumbnail. Your destination should guide how much correction feels appropriate.
Because the app is rated for Everyone, its presentation is intended to be approachable. That does not mean every result is automatic or perfect. The important early question is not “which button gives the strongest effect?” but “what single defect am I trying to fix?” Once that is clear, the interface becomes much easier to judge.
Your first meaningful success
For a first attempt, I would start with a portrait that is recognizable and only slightly soft. Choose the enhancement action, let the app process the image, and then inspect three areas: the eyes, the hairline, and any small lettering in the background. These areas reveal different weaknesses. Eyes show whether facial details have become artificial, hair reveals smearing, and lettering shows whether the app has invented shapes rather than recovered real detail.
If the result looks cleaner without making the face strangely smooth, save that version as your first success. Do not immediately add several retouching effects. The purpose of this first pass is to learn the app’s baseline treatment and understand how much improvement the original image can realistically support.
A useful workflow is to enhance first, remove an object second, and retouch last. Sharpening can make a distraction more noticeable, so removing it after enhancement may be easier to evaluate. Retouching should come at the end because skin or facial corrections can hide whether the initial enhancement was actually helpful. This order also makes it easier to identify which action caused an unwanted result.
Object removal deserves patience. It tends to work best when the unwanted item is surrounded by a simple, consistent background such as a plain wall, pavement, or open sky. It becomes more difficult when the object overlaps hair, hands, patterned clothing, thin branches, or text. If the first attempt leaves a repeated texture or an obvious blur, I would undo it and use a smaller, more precise selection rather than repeatedly applying the same correction.
That is a non-obvious trade-off with automatic removal: a larger selection may feel faster, but it also gives the app more background to reconstruct. On a simple surface, that may be harmless. Near a person or a strong pattern, it can erase useful detail. Small, targeted edits are usually safer than trying to clear an entire crowded area in one gesture.
Retouching without losing the person in the photo
Portrait retouching is where restraint matters most. I would use it for a clearly temporary distraction, such as a small spot or an uneven detail that draws attention away from the subject. I would not use the strongest possible treatment across the entire face. Natural features provide structure, and removing every line or texture can make the image feel less like a photograph and more like a generated surface.
Try checking the image at normal viewing size instead of judging only while zoomed in. Close inspection is useful for finding artifacts, but it can also make tiny imperfections seem more important than they are. If the edited portrait looks believable in the context where you will actually use it, that is a better measure than making every pixel look flawless.
There is also a social consideration. A quick retouch can be fine for a casual profile image, but it is worth being honest with yourself about what you are changing. If you are preparing a professional headshot, a portfolio image, or a photo that needs to represent someone accurately, subtle corrections are safer than dramatic reshaping. In those situations, a manual editor with transparent adjustments may be the better choice.
Common points of confusion during everyday use
The word “enhance” can create unrealistic expectations. It can improve the appearance of an image, but it cannot reliably recover information that was never captured. A severely blurred face, a tiny cropped subject, or a heavily damaged old scan may receive a more polished appearance without becoming genuinely accurate. I would treat the output as an interpretation, not proof of hidden detail.
This matters especially with text. If you are trying to read a distant sign, document, or label, sharpening may make the letters look more defined while still leaving them incorrect. For important information, use the original image and another source whenever possible. The app is better suited to visual cleanup than to guaranteeing the exact recovery of unreadable writing.
Another possible confusion is the difference between removing an object and cropping it out. If the unwanted item is close to the edge, cropping may produce a cleaner and more honest result than asking the app to rebuild the missing background. Removal is more useful when cropping would damage the composition or cut into the main subject. Choosing between those methods is a creative decision, not simply a matter of selecting the most advanced tool.
Users may also wonder why an edit that looks good in the preview does not feel equally good after saving or sharing. Different apps and social platforms can resize or compress images. A result that depends on fine texture may lose some of its impact after that process. I recommend looking at the saved copy in the gallery before sharing it, then checking the shared version if the destination is important.
In-app purchases are another point worth considering before committing to a regular workflow. Since individual purchases can reach $49.99, I would read each purchase screen carefully and avoid assuming that every editing option belongs to the free experience. For occasional touch-ups, the free installation may be sufficient. For repeated use, compare the cost of the specific tools you need with a familiar alternative before paying.
The current version is 0.0.5.1_20260306. I would not judge the entire app by one unusual processing result, but I would keep expectations measured when using a relatively early-looking version label. Save important originals, inspect the output, and update through the normal app store process when an update is offered. Those habits are sensible for any editor that changes the appearance of personal images.
A realistic phone scenario
Imagine taking a group photo outside a café. The people are clear enough, but a small sign behind one person competes with the faces, and the image looks slightly soft because the phone moved at the moment of capture. I would first duplicate the picture, apply a restrained enhancement, and inspect the faces rather than the sign. If the people still look natural, I would then remove only the distracting part of the sign, avoiding the nearby hair and shoulder.
After that, I would use retouching only if one minor mark remained visually dominant. Finally, I would compare the finished image with the original at the size where I plan to share it. If the background repair is obvious, I would revert that step and crop slightly instead. This workflow uses the app’s strengths while recognizing that the cleanest result may come from combining an automatic tool with a simpler composition change.
That scenario also shows why the app is not just a one-tap solution. The meaningful improvement comes from choosing the right order, limiting the area of each correction, and knowing when to stop. Those decisions are more valuable than chasing the most dramatic preview.
Where it fits beside familiar alternatives
Compared with a standard phone gallery editor, AI Photo Editor: Photo Enhance is more focused on automatic cleanup and reconstruction. A gallery editor may be quicker for cropping, rotating, adjusting brightness, or applying a basic filter. If your photo only needs exposure correction, opening the built-in editor can be simpler and less disruptive.
Compared with a full manual photo editor, this app is easier for a beginner who wants a result without learning layers, masks, or detailed sliders. The trade-off is control. Manual tools let you decide exactly where sharpening applies, how much skin texture remains, and how an object is removed. If you edit professionally, need repeatable settings, or work with complex backgrounds, that control is likely worth more than automatic speed.
It also occupies a different space from dedicated portrait applications. Those apps may concentrate on makeup, face shaping, lighting, or stylized effects, while this one is more appealing when the problem is image clarity or a distracting object. I would choose it when the photograph is basically good but needs repair, not when I want to redesign the entire look of a portrait.
The app’s strongest advantage is the short path from an ordinary image to a more shareable one. Its weakness is that automatic corrections can be difficult to fine-tune when the first result is almost right but not quite. That “almost” is where a manual editor often wins. For a casual user, however, avoiding a steep learning curve may matter more than having every possible adjustment.
Who should skip it
I would skip it if you need guaranteed factual recovery from blurred evidence, precise retouching for commercial work, or a carefully controlled editing history. It is also not my first choice for batch processing a large collection where every image must receive the same treatment. A dedicated desktop workflow or a more manual mobile editor would be safer in those cases.
I would also look elsewhere if your main interest is creative compositing, advanced typography, detailed color grading, or building an image from several layers. The app’s purpose is narrower and more practical. That focus is helpful when it matches your needs, but limiting when you expect a complete creative suite.
On the other hand, beginners who feel intimidated by professional editors may find the focused approach reassuring. You can start with one imperfect picture, test one correction, and decide whether the result is good enough. There is no need to understand every editing concept before making a useful improvement.
My recommendation after using it as a beginner-focused editor
AI Photo Editor: Photo Enhance makes the most sense as a quick repair tool for everyday photos. I like the idea of beginning with a soft portrait or a small background distraction, making a restrained correction, and judging the saved result at its intended size. That approach avoids the common mistake of treating automatic enhancement as a reason to apply every effect at maximum strength.
AMOBEAR TECHNOLOGY GROUP has positioned the app clearly enough for casual beauty and photo cleanup, and the broad install base shows that the concept has found an audience. The 4.1 average is consistent with an app that can be useful while still producing occasional results that need supervision. I would recommend it to someone who wants a friendly first step into AI-assisted editing and values speed over detailed manual control.
My advice is to keep the original, start with one problem, inspect faces and repeating backgrounds, and use object removal carefully around hair, hands, and text. If the result looks artificial, undo the strongest step rather than trying to cover it with another effect. And before buying anything, test the free experience on the kind of images you genuinely edit.
In short, this is a practical choice for making a decent photo look cleaner with limited effort. It is not the right tool for forensic clarity, professional retouching, or complex creative work, but it can shorten the distance between an almost-good snapshot and one you are comfortable sharing. If that is the job you need done, I think it is worth trying.
FAQs for AI Photo Editor: Photo Enhance
01What features does AI Photo Editor: Photo Enhance offer?
AI Photo Editor: Photo Enhance offers a variety of features designed to improve your photos effortlessly. Key features include automatic photo enhancement, background removal, color correction, and advanced filters. The app uses AI technology to detect and enhance details, sharpen images, and adjust lighting, providing professional-quality edits with minimal effort.
02Is AI Photo Editor: Photo Enhance easy to use for beginners?
Yes, AI Photo Editor: Photo Enhance is designed with user-friendliness in mind. Its intuitive interface allows even beginners to navigate through the app with ease. The app provides step-by-step guides and tooltips to assist users in making the most out of its features without requiring any prior photo editing experience.
03Does AI Photo Editor: Photo Enhance support batch processing?
AI Photo Editor: Photo Enhance does support batch processing, making it convenient for users who need to edit multiple photos at once. This feature is particularly useful for photographers or social media influencers who want to apply consistent edits across a series of images efficiently, saving time and effort.
04Are there any in-app purchases or subscriptions in AI Photo Editor: Photo Enhance?
AI Photo Editor: Photo Enhance offers a free version with basic features, but also includes in-app purchases and subscription plans for access to advanced features. These may include premium filters, higher resolution exports, and additional editing tools. Users can choose a plan that best suits their needs and budget.
05Is AI Photo Editor: Photo Enhance secure in terms of privacy?
The app prioritizes user privacy and security. AI Photo Editor: Photo Enhance does not store photos on its servers and ensures that all edits are processed locally on your device. Users can be confident that their images and data remain private and are not shared without consent.
Pros
- Intuitive user interface
- easy to navigate.
- Enhances photos with impressive AI precision.
- Wide range of editing tools available.
- Quick processing time for edits.
- Supports high-resolution image output.
Cons
- Some features require in-app purchases.
- Occasional slowdowns on older devices.
- Limited free version capabilities.
- Ads can be intrusive at times.
- Steep learning curve for beginners.

AI Photo Editor: Photo Enhance
Gallery